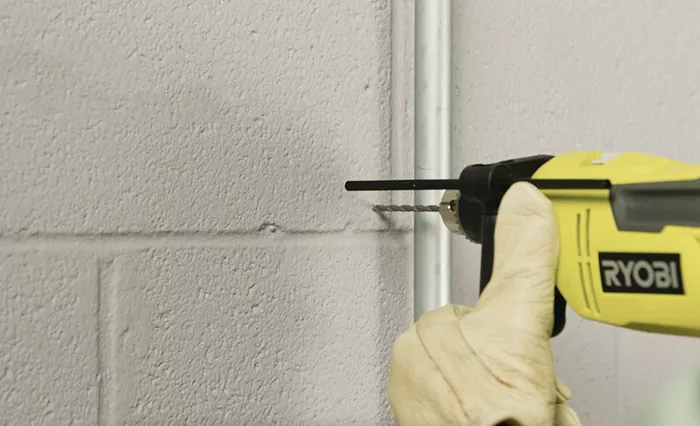
Drilling into concrete can be challenging, but with the right tools and techniques, you can achieve clean and precise holes. This guide provides step-by-step instructions on how to drill into concrete effectively, covering essential tools, safety tips, and best practices.
1. Gather the Necessary Tools
Essential Tools for Drilling into Concrete
Hammer Drill
Purpose: A hammer drill combines rotational motion with a pulsating hammering action, making it ideal for breaking through concrete and masonry. It’s essential for drilling into hard surfaces like concrete.
Features to Look For: Choose a hammer drill with adjustable speed settings and impact force for versatility in different concrete types.
Masonry Drill Bits
Type: Use masonry drill bits, which are specifically designed for drilling into concrete and other hard materials. These bits are made of carbide or tungsten for durability.
Sizes: Select the appropriate bit size for your project, ensuring it matches the diameter of the hole you need.
Protective Gear
Safety Glasses: Protect your eyes from flying debris and dust generated during drilling.
Ear Protection: Use earplugs or earmuffs to protect your hearing from the loud noise of the hammer drill.
Dust Mask: Wear a dust mask to avoid inhaling concrete dust, which can be harmful to your respiratory system.
Additional Tools
Level: Ensures that your drill holes are perfectly straight and aligned.
Tape Measure: For accurate measurements and placement of drill holes.
Pencil or Marker: To mark the drill spots clearly before starting.
See also: Concrete Anchors 101: Everything You Need To Know
2. Prepare the Work Area
Clear the Area
Remove Obstacles: Ensure the area around the drilling spot is clear of any tools, materials, or other obstructions.
Check for Utilities: Use a stud finder or utility locator to ensure there are no hidden pipes or electrical wires behind the concrete.
Mark the Drill Spot
Measure and Mark: Use a tape measure to determine the exact location for your holes and mark it with a pencil or marker. A level can help ensure your markings are even and aligned.
Double-Check Measurements: Verify the accuracy of your measurements and markings before drilling to avoid mistakes.
3. Set Up the Hammer Drill
Select the Right Drill Bit
Choose Masonry Bits: Ensure you are using a masonry drill bit that is suitable for the size of the hole you need. Check the bit’s specifications for compatibility with concrete.
Adjust the Drill Settings
Set the Hammer Function: Switch the hammer drill to the hammering mode, which combines rotary and percussion action for effective drilling into concrete.
Speed Settings: Adjust the drill speed according to the hardness of the concrete. For harder surfaces, use a slower speed with higher impact force.
See also: Husqvarna Chainsaw: The Ultimate Tool For Professional And Home Use
4. Drilling Process
Drill the Hole
Position the Drill: Place the drill bit on the marked spot and align it perpendicular to the concrete surface.
Start Drilling: Begin drilling at a slow speed to create a small pilot hole. This helps to guide the bit and reduces the risk of slipping.
Apply Steady Pressure: Apply consistent, moderate pressure to the drill, allowing the hammering action to break through the concrete. Avoid excessive force, as it can damage the drill bit or the surface.
Cool the Drill Bit
Periodic Pull-Out: Occasionally pull the drill bit out of the hole to remove concrete dust and debris. This helps keep the bit cool and prevents overheating.
Use Water: For larger or deeper holes, consider using a spray bottle to keep the bit and hole cool and to reduce dust.
Check the Hole Depth
Measure Depth: Use a depth gauge or the markings on the drill bit to ensure the hole is drilled to the required depth.
Clean the Hole: Remove any debris or dust from the hole to ensure a clean surface for anchors or fittings.
5. After Drilling
Install Anchors or Fittings
Choose the Right Anchors: Depending on your project, use appropriate wall anchors or plugs to secure screws or other fittings in the concrete.
Insert Anchors: Place the anchors into the drilled holes and tap them gently with a hammer to ensure a snug fit.
Secure Screws or Fixtures
Insert Screws: Use a screwdriver or drill to insert screws into the anchors, ensuring they are tightly secured.
Check Stability: Verify that the screws or fixtures are securely fastened and that the anchors are properly seated in the concrete.
6. Safety and Maintenance
Safety Tips
Follow Manufacturer Instructions: Always read and follow the manufacturer’s instructions for both the hammer drill and masonry bits.
Maintain Proper Posture: Stand in a stable position and grip the drill firmly to control it effectively.
Avoid Overexertion: Take breaks if needed to prevent fatigue and ensure safe operation.
Tool Maintenance
Clean the Drill: After use, clean the hammer drill and drill bits to remove concrete dust and debris.
Inspect Bits: Check drill bits for signs of wear or damage and replace them as needed to maintain optimal performance.
Store Properly: Store tools and accessories in a dry, clean environment to prevent rust and damage.
Conclusion
By following these detailed steps and tips, you can effectively and safely drill into concrete. Whether you’re working on a home improvement project, installing fixtures, or completing a professional task, proper preparation and technique will ensure successful results.
Related Topics:

