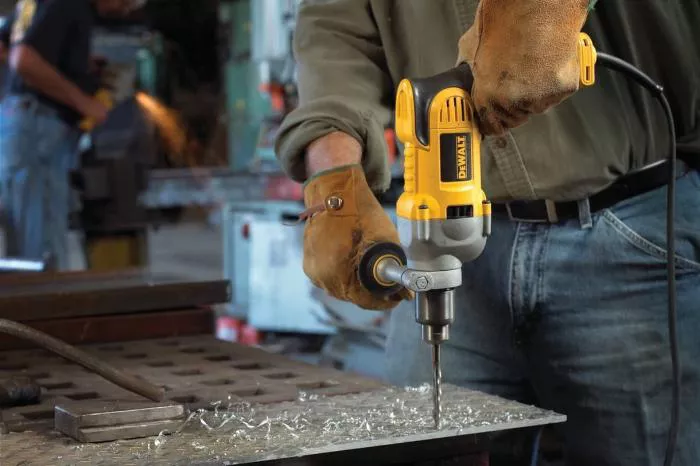
Electric drills are powerful tools that demand respect and proper preparation before use. Many workshop accidents occur not during operation but in the preparation phase when users overlook essential safety checks. This article will guide you through the comprehensive pre-operation procedures that separate professionals from amateurs.
The first moments with your electric drill determine the safety and quality of your entire project. Rushing into operation without proper preparation leads to damaged materials, inferior results, and potentially serious injuries. Let’s examine what truly professional craftspeople do before they ever pull the trigger.
Inspecting the Power Source and Electrical Components
Always begin with the power source examination. For corded drills, carefully inspect the entire length of the power cord. Look for any fraying, cuts, or exposed wires that could cause electrical hazards. The plug should have all prongs intact without bending or damage.
Check the drill’s power switch for proper functionality. It should move smoothly between on and off positions without sticking. Test the switch without plugging in the drill to feel its operation. Faulty switches can lead to unexpected startups, creating dangerous situations.
Examine the drill’s housing for cracks or damage. Pay special attention to ventilation slots, which must remain clear of debris. Blocked vents cause overheating that shortens tool life and creates fire risks. Use a soft brush to clean any dust accumulation in these areas.
Verifying Drill Bit Selection and Installation
Choosing the correct bit represents half of your drilling success. Match the bit material to your workpiece – masonry bits for concrete, twist bits for metal, spade bits for wood. Inspect the bit for sharpness and straightness before installation. Dull bits require excessive force, increasing accident risks.
Insert the bit fully into the chuck and tighten securely using the chuck key. Perform a manual rotation test after tightening – the bit shouldn’t wobble or move independently from the chuck. For keyless chucks, hand-tighten firmly then give an extra quarter turn to ensure proper grip.
Consider the bit length relative to your project. Excessively long bits can bend or break under pressure, while short bits may not reach your desired depth. The flutes should extend beyond your material thickness for proper chip removal.
Personal Protective Equipment Assessment
Never operate an electric drill without appropriate PPE. Safety glasses with side shields protect against flying debris that regular glasses miss. Consider a full face shield when working with brittle materials that might shatter.
Wear close-fitting clothing without dangling sleeves or loose accessories that could catch in rotating parts. Tie back long hair securely. Heavy-duty work gloves improve grip but ensure they don’t interfere with trigger operation.
Hearing protection becomes necessary for extended drilling sessions, especially with hammer drill functions. Basic foam earplugs reduce noise effectively when properly inserted. Dust masks or respirators are essential when drilling materials producing harmful particulates.
Workspace Preparation and Material Securing
Evaluate your work area for stability and clearance. The work surface must support both your material and applied pressure without shifting. Clear the immediate area of trip hazards and ensure adequate lighting for precision work.
Secure your workpiece using clamps or a vise whenever possible. Never attempt to hold materials by hand while drilling – rotational force can suddenly bind the bit, whipping the material violently. Place scrap wood beneath workpieces to prevent tear-out on the back side.
Mark your drilling locations clearly with a center punch for metal or an awl for wood. These starter indentations prevent bit wandering for accurate hole placement. Double-check measurements before committing to the drill.
Understanding the Drill’s Controls and Features
Familiarize yourself with all adjustable features on your specific drill model. Locate the speed selector switch and understand its positions. Lower speeds work best for larger bits and harder materials, while higher speeds suit smaller bits in softer materials.
Identify the torque adjustment collar if your drill has this feature. Setting appropriate torque prevents overdriving screws and reduces bit breakage risks. Start with lower torque settings and increase gradually as needed.
Practice operating the reverse function before needing it. Knowing how to quickly switch directions helps when removing stuck bits. Check that the forward/reverse selector moves positively between positions without ambiguity.
Performing the Final Safety Check
Conduct a complete tool inspection with the drill unplugged or the battery removed. Rotate the chuck by hand to feel for any grinding or roughness in the bearings. Listen for unusual sounds that might indicate internal damage.
Verify your stance provides balance and control. Maintain a wide base with your feet shoulder-width apart. Position yourself so that if the drill binds, your body won’t be thrown off balance. Keep the cord or battery pack clear of the drilling path.
Do a mental rehearsal of the drilling operation. Visualize the bit entering the material, the pressure you’ll apply, and how you’ll handle completion. This mental preparation significantly reduces operational errors.
Conclusion
Professional results begin long before the drill bit touches material. The meticulous preparation process outlined here separates safe, effective operations from dangerous guesswork. By making these pre-operation checks second nature, you ensure both personal safety and project quality. Remember that every master craftsman’s skill begins with respect for proper preparation – your electric drill deserves nothing less.
Relate topics:

