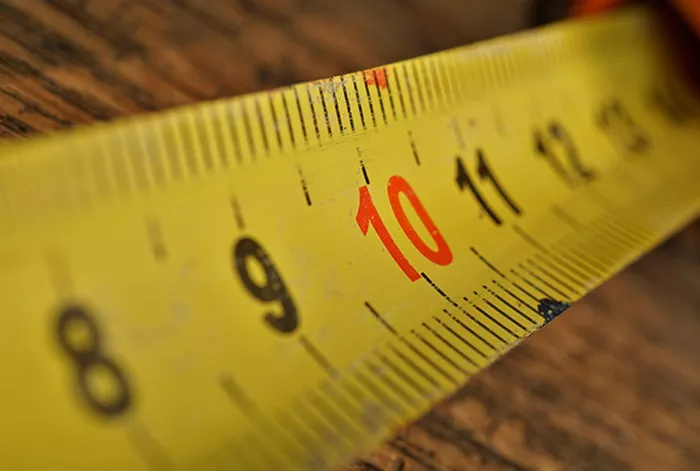
Understanding how to read a tape measure in millimeters is an essential skill for many projects that require precision, from construction work to sewing and woodworking. In this guide, we’ll break down the steps and provide a detailed explanation of how to read and use a tape measure that displays measurements in millimeters.
The Metric System Overview
The metric system, used globally in many fields, is based on meters, with millimeters being a subunit of the meter. The metric system is decimal-based, making conversions between units straightforward.
1 meter (m) = 1,000 millimeters (mm)
1 centimeter (cm) = 10 millimeters (mm)
The smallest unit commonly shown on a metric tape measure is the millimeter, which is the focus of this guide.
Components of a Metric Tape Measure
To accurately read a tape measure in millimeters, it’s important to recognize the various components and markings that appear on it. Below are the primary features:
Millimeter Marks: These are the shortest lines on the tape measure. Each line represents one millimeter.
Centimeter Marks: Every 10 millimeters, there is usually a longer line representing a centimeter. Centimeter marks are often numbered to make counting easier.
Meter Marks: For tape measures with longer ranges, there may be meter marks (every 100 centimeters or 1,000 millimeters).
See also: Speed Square Performance Review: How Reliable Is It?
Step-by-Step Guide to Reading a Tape Measure in Millimeters
Step 1: Identify the Millimeter Marks
When you look at a metric tape measure, the smallest lines represent millimeters. These lines are evenly spaced across the entire tape. Millimeters are the smallest standard unit displayed on metric tape measures, and each individual line indicates one millimeter.
For example
If you see 10 small lines between two numbered centimeter marks, each of those small lines represents 1 millimeter. The 10th line will be a bit longer, indicating a full centimeter.
Step 2: Understand Centimeter Markings
Centimeter markings are longer than the millimeter lines and are generally numbered. Each centimeter is equivalent to 10 millimeters, so every centimeter mark will appear as a longer line with a number next to it (e.g., 1, 2, 3, etc.).
For example
The number “3” on the tape measure represents 3 centimeters, which is equal to 30 millimeters.
Step 3: Count the Millimeter Marks Between Centimeters
To measure an object accurately, locate the nearest centimeter mark before the object’s edge and then count the millimeter lines that extend beyond that centimeter.
Example
If you are measuring an object and the edge falls 7 small lines past the 4 cm mark, your measurement would be 47 millimeters (40 mm for 4 cm plus 7 mm).
Step 4: Calculate the Total Measurement in Millimeters
When measuring, always start at the “0” mark on the tape measure. Begin by identifying the nearest full centimeter before the edge of the object, and then count how many millimeters follow the last full centimeter mark.
Example
If your measurement falls at 5 centimeters and 4 millimeters past that, your total measurement is 54 millimeters (50 mm for the full 5 centimeters plus 4 mm).
Step 5: Convert Measurements if Necessary
Some projects might require you to convert between different metric units. If your measurement is given in centimeters but you need millimeters, you can easily convert by multiplying by 10.
For example
A measurement of 7 centimeters is equivalent to 70 millimeters (7 cm x 10 mm/cm = 70 mm).
This is useful when precision is required at the millimeter level, such as in fine carpentry or metalwork.
Practical Example of Reading a Tape Measure in Millimeters
Let’s say you are measuring the length of a piece of wood, and the tape measure reads 8 cm and 5 mm. Here’s how you would break that down:
Find the Full Centimeter Mark: The tape measure shows 8 centimeters.
Count the Millimeter Marks After 8 cm: You count 5 small lines after the 8 cm mark.
Calculate the Total in Millimeters: Since 8 cm equals 80 millimeters and there are 5 extra millimeters, the total length is 85 millimeters.
Additional Tips for Accuracy
Here are some tips to help you ensure that your measurements are as accurate as possible when reading a tape measure in millimeters:
Hold the Tape Steady: To avoid any errors, keep the tape measure taut and steady while measuring. Any slack can lead to inaccurate readings.
Start at the “0” Mark: Always start measuring from the “0” mark. Some tape measures have a slight gap before the first millimeter mark, so make sure you’re starting at the correct point.
Use Good Lighting: Make sure you’re working in a well-lit area, as millimeter markings can be small and easy to miss in poor lighting.
Double-Check Measurements: When precision is important, measure twice to confirm accuracy. This is particularly useful in projects that involve cutting or drilling.
Read from the Same Angle: Look at the tape measure straight on to avoid any parallax error, which can occur if you read it from an angle.
Conclusion
Reading a tape measure in millimeters is a simple yet essential skill, especially when accuracy is critical. By understanding how millimeter and centimeter marks are represented on a tape measure, you can confidently and accurately measure objects down to the millimeter. Whether you’re working on construction, crafts, or home improvement projects, mastering this technique ensures that you get precise measurements every time. With this knowledge, you can approach your next project with the confidence that you are measuring correctly and ensuring that all your measurements are as precise as possible.
Related Topics:
-
Kershaw Pocket Knives Unveiled: Power, Precision, And Practicality In Your Pocket
-
Ultimate Guide To Circuit Tracers: How To Choose The Best One For Your Needs
-
Exploring The Dremel 4000: What Makes It A Top Choice For DIY Enthusiasts
-
Evaluating The Ryobi Impact Wrench: What You Need To Know Before Buying

