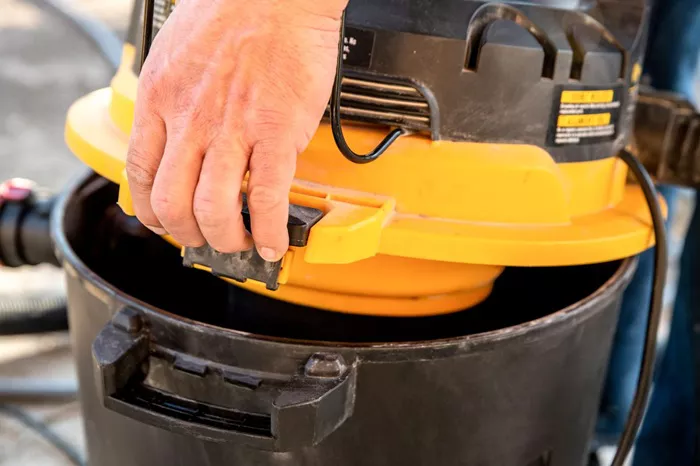
A shop vac, also known as a wet/dry vacuum, is a versatile tool designed to handle both dry debris and liquid spills. Whether you’re dealing with a minor water spill or a larger flooding situation, understanding how to use your shop vac effectively can make the cleanup process faster and more efficient. This guide will provide a comprehensive overview of the steps involved in using a shop vac for water cleanup, including preparation, operation, and maintenance.
1. Understanding Your Shop Vac’s Capabilities
Wet/Dry Model
Functionality Check: Ensure that your shop vac is indeed a wet/dry model, as standard vacuums are not equipped to handle liquids. Wet/dry shop vacs are specifically designed to handle both types of debris.
Specifications Review: Look at the manufacturer’s specifications for your model to confirm its capacity for liquid pickup. Check the maximum liquid capacity and any specific recommendations for use.
User Manual
Read the Manual: Consult the user manual that came with your shop vac. It will provide crucial information on the correct filters to use, operational modes, and any specific instructions related to liquid cleaning. If you no longer have the manual, it’s often available online on the manufacturer’s website.
2. Preparing the Shop Vac
Power Off
Unplug the Vacuum: Before making any modifications or attachments, ensure the shop vac is unplugged from the electrical outlet. This prevents accidental starts and ensures safety during setup.
Filter Setup
Check Filter Type: Shop vacs use different filters for dry and wet cleaning. For water cleanup, you typically need a foam filter or a filter bag specifically designed for liquids. Using a dry filter for wet cleaning can lead to clogging or damage.
Install the Liquid Filter: If your model uses a specific filter for liquids, follow the manufacturer’s instructions to install it properly. This often involves removing the dry filter and replacing it with the appropriate liquid filter.
Hose and Nozzle
Attach Hose and Nozzle: Use the hose and nozzle that are best suited for liquid pickup. A wide or flat nozzle is generally more effective for quickly removing water. Ensure that these attachments are securely connected to prevent leaks.
See also: Top 5 Shop Vacs Of 2024: An In-Depth Evaluation Of Performance And Features
3. Configuring the Shop Vac for Liquid Pickup
Remove Dry Filter
Filter Removal: If your shop vac has a dry filter installed, remove it before beginning the water cleanup process. Wet filters can become damaged and ineffective if used for liquid pickup.
Dispose or Clean: Depending on the filter type, you may need to clean or dispose of it according to the manufacturer’s recommendations.
Set to Wet Mode
Mode Selection: Many shop vacs have a switch or dial to select between wet and dry modes. Ensure that the vacuum is set to the wet mode to optimize suction and performance for liquid cleanup.
4. Beginning the Vacuuming Process
Positioning the Hose
Insert Hose into Water: Place the hose into the area with standing water. Start from the edges and work towards the center to ensure thorough coverage.
Controlled Movement: Move the hose slowly and steadily. Rapid movements can reduce suction efficiency and leave behind residual water.
Avoid Overfilling
Monitor Tank Level: Regularly check the water level in the tank. Most shop vacs have a fill line or indicator to help you avoid overfilling.
Empty the Tank: If the tank becomes full, turn off the vacuum, unplug it, and empty the water. Some models feature a drain plug at the bottom for easy water disposal.
Adjusting the Hose Position
Reposition as Necessary: For larger areas, move the hose around to different sections to ensure that all water is picked up. This helps to prevent any water from being missed.
See also: Best Wet/Dry Vacuum Cleaners: Our Top Recommendations For Versatile Cleaning
5. Cleaning and Maintenance After Use
Empty and Rinse
Tank Cleaning: After removing water, empty the tank and rinse it with clean water to remove any remaining debris or residues.
Filter Maintenance: If your vacuum uses a reusable filter, rinse it thoroughly with water and let it dry completely before reinstalling. Ensure the filter is free of any clogs or damage.
Drying
Wipe Down Components: After cleaning, wipe down the inside of the tank, the hose, and other components to remove any excess moisture. This helps prevent mold and mildew growth.
Air Dry: Allow all components to air dry completely before storing the shop vac. This prevents moisture-related issues and ensures the vacuum is ready for the next use.
6. Proper Storage
Store in a Dry Area
Avoid Moist Conditions: Store the shop vac in a dry and well-ventilated area to prevent rust and deterioration. Avoid storing it in damp or humid environments.
Regular Inspection
Check for Damage: Periodically inspect the vacuum for signs of wear, damage, or malfunction. Look for issues such as cracks, leaks, or worn-out parts.
Address Issues Promptly: If you notice any problems, address them immediately to prevent further damage and maintain the vacuum’s efficiency.
Reassembly
Reassemble Components: Once everything is dry and clean, reassemble the vacuum. Ensure that all filters, hoses, and other components are correctly installed and secured.
Conclusion
Using a shop vac for water cleanup can be a highly effective solution for managing spills and liquid messes. By understanding your shop vac’s capabilities, properly preparing and configuring the equipment, and following correct maintenance procedures, you can ensure a smooth and efficient cleanup process. Regular upkeep and proper storage will also help extend the lifespan of your shop vac, making it a reliable tool for both wet and dry cleaning tasks. With these detailed steps, you can confidently handle any water cleanup job with your shop vac.
Related Topics:
-
How To Evaluate The Cost Of Quartz Countertops: Factors, Brands, And Installation
-
How To Read A Tape Measure In Millimeters (Mm): A Detailed Guide

