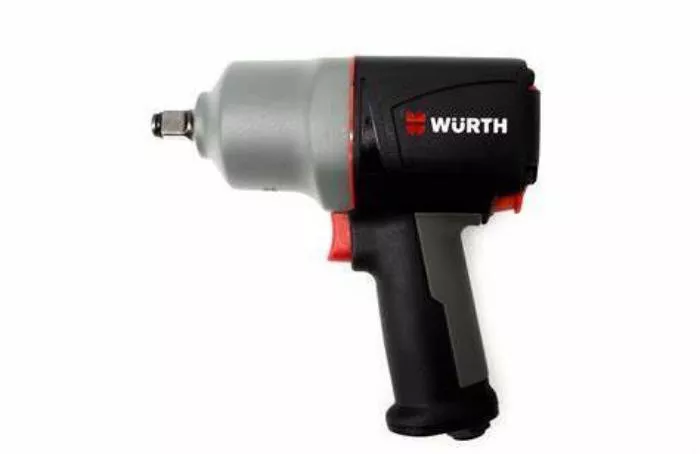
Pneumatic impact wrenches are powerful tools that deliver high torque output through compressed air. These tools contain several critical components that work together to create rotational force. The main parts include an air motor, hammer mechanism, anvil, and trigger assembly.
The air motor converts compressed air into mechanical energy. This energy gets transferred to the hammer mechanism which creates the impacting action. The anvil receives these impacts and turns the socket. When any of these components fail, the tool stops working properly.
Common Pneumatic Impact Wrench Problems
Air leaks represent the most frequent issue with pneumatic tools. These leaks often occur at connection points or through worn seals. Another common problem is reduced power output, which typically indicates issues with the hammer mechanism or air motor.
Tool users often report problems with the reversing mechanism. This component allows the wrench to switch between tightening and loosening directions. When it fails, the tool may get stuck in one direction or not respond to selector switch movements.
Essential Tools for Repair
Before attempting repairs, gather necessary tools. You will need a complete set of screwdrivers, both flathead and Phillips. Allen wrenches in various sizes help access internal components. Snap ring pliers are essential for removing retaining rings.
A rubber mallet proves useful for disassembly without damaging parts. Always keep a set of toothbrushes and compressed air for cleaning. Have lubricating oil specifically designed for pneumatic tools ready for reassembly.
Step by Step Repair Process
Begin by disconnecting the tool from any air supply. Remove all external screws and carefully separate the housing. Take pictures during disassembly to help with reassembly later. Pay attention to the orientation of components as you remove them.
Inspect the air inlet for debris and clean it thoroughly. Check the rotor vanes in the air motor for wear or breakage. Examine the hammer mechanism for chipped or worn parts. Look at the anvil for signs of excessive wear or damage.
Replacing Worn Components
Worn rotor vanes must be replaced to restore proper motor function. When replacing vanes, ensure they slide freely in their slots. The hammer mechanism may need complete replacement if internal components show significant wear.
Seals and O-rings should always be replaced during repairs. These inexpensive components often cause air leaks when worn. Use manufacturer specified parts for best results and longest service life.
Reassembly and Testing
Clean all components thoroughly before reassembly. Apply pneumatic tool oil to moving parts during reassembly. Follow your disassembly photos in reverse order to ensure proper placement of all components.
After reassembly, connect the tool to an air supply and test at low pressure first. Listen for unusual noises that might indicate improper assembly. Check both forward and reverse functions before applying full operating pressure.
Preventive Maintenance Tips
Regular maintenance prevents many common problems. Always drain moisture from air lines before connecting tools. Add a few drops of pneumatic tool oil to the air inlet daily when using the tool frequently.
Store the tool in a clean, dry environment when not in use. Avoid dropping the tool as impacts can damage internal mechanisms. Periodically disassemble and clean the tool even when it appears to be working properly.
Troubleshooting Specific Issues
When the tool runs but doesn’t deliver impact force, focus on the hammer mechanism. If the tool doesn’t run at all, check for air supply issues first, then examine the motor. For tools that leak air continuously, inspect all seals and connection points.
Strange noises often indicate foreign objects inside the tool or damaged bearings. Vibration issues usually relate to imbalance in the rotating assembly or worn motor components.
Safety Considerations
Always wear eye protection when working with pneumatic tools. Disconnect air supply before attempting any repairs. Be cautious of spring loaded components that may fly out during disassembly.
Work in a clean, well lit area to avoid losing small parts. Never force components that don’t seem to fit properly during reassembly. Use proper tools for each task to prevent damage to components.
When to Seek Professional Help
Some repairs require specialized knowledge and tools. If after basic troubleshooting the tool still doesn’t function properly, consider professional service. Complex gearbox issues or motor winding problems often need expert attention.
Manufacturer authorized service centers have access to proprietary parts and technical information. For expensive professional grade tools, professional repair often proves more economical than replacement.
Conclusion
Repairing a pneumatic impact wrench requires patience and attention to detail. Understanding the tool’s mechanism helps diagnose problems accurately. Regular maintenance significantly extends tool life and prevents many common issues.
Most repairs can be completed with basic tools and mechanical aptitude. Always prioritize safety and don’t hesitate to seek professional assistance for complex problems. Properly maintained pneumatic impact wrenches provide years of reliable service in demanding work environments.
Relate topics:
- What is a 3/8 Impact Wrench Used For?
- How Are Power Tools Classified?
- 4 Best Power Tools for Mechanics

