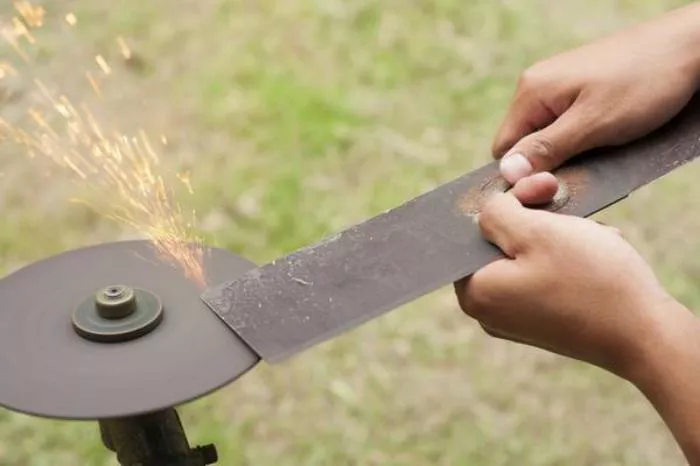
Keeping your lawn mower blades sharp is essential for maintaining a healthy, vibrant lawn. Dull blades don’t just make your mowing job harder—they actually damage your grass by tearing rather than cutting cleanly. This leads to unsightly brown tips, increased moisture loss, and makes your lawn more vulnerable to disease. While you can sharpen blades freehand with a file, using a properly designed jig ensures perfect consistency and accuracy every time. This comprehensive guide will walk you through building a simple yet highly effective jig for sharpening lawn mower blades, while also sharing crucial professional maintenance knowledge to keep your equipment in top shape.
Understanding Lawn Mower Blade Sharpening
Before building a jig, it’s important to understand why sharpening is necessary and how it affects mower performance. Lawn mower blades rotate at high speeds, slicing grass with a clean cut when sharp. A dull blade crushes the grass, causing frayed edges that lose moisture and turn brown.
Key benefits of sharp blades
- Clean cuts promote healthier grass growth
- Reduced strain on the mower’s engine
- More even cutting for a professional-looking lawn
A sharpening jig helps maintain the correct angle, ensuring each sharpening session is precise and uniform.
Materials Needed for Building a Sharpening Jig
You don’t need expensive tools to make a functional jig. Here’s what you’ll need:
- A sturdy wooden base (such as plywood or hardwood)
- Metal brackets or clamps to secure the blade
- A protractor or angle guide
- A file or grinding tool
- Screws and bolts for assembly
- Safety gloves and goggles
The goal is to create a stable platform that holds the blade at the correct angle while sharpening.
Step by Step Guide to Building the Jig
Designing the Base
Start by cutting a wooden base large enough to hold the mower blade securely. A piece of plywood around 12×12 inches works well. Sand the edges to prevent splinters.
Attaching the Blade Clamping Mechanism
The blade must be held firmly in place during sharpening. Use metal brackets or heavy-duty clamps to secure the blade to the base. Position them so the blade’s cutting edge extends slightly beyond the base for easy access.
Setting the Correct Sharpening Angle
Most lawn mower blades have a cutting angle between 30 and 45 degrees. Use a protractor to mark this angle on the jig. You can attach a guide block to the base to ensure your file or grinder stays at the correct angle.
Testing the Jig for Stability
Before sharpening, test the jig by lightly running a file along the blade. If the blade moves or the angle feels inconsistent, adjust the clamps or guide block. The blade should remain steady throughout the sharpening process.
How to Use the Jig for Sharpening?
Once your jig is ready, follow these steps for optimal sharpening:
- Secure the blade in the jig, ensuring it doesn’t wobble.
- Using a mill file or grinder, move along the cutting edge in smooth, consistent strokes.
- Maintain the preset angle to avoid uneven sharpening.
- Check the blade’s balance by hanging it on a nail—if one side tilts down, remove more material from the heavier side.
Important: Always wear gloves and eye protection when sharpening blades.
Maintaining Your Lawn Mower Blades
Sharpening is just one part of blade maintenance. Follow these additional tips for long-lasting performance:
Clean blades after each use: Grass clippings and moisture can cause rust.
Inspect for damage: Cracks or bends mean the blade needs replacement.
Balance after sharpening: An unbalanced blade causes vibration and engine wear.
Common Mistakes to Avoid When Sharpening Blades
Many DIY enthusiasts make errors that reduce blade effectiveness. Avoid these pitfalls:
- Sharpening only one side of the blade, leading to imbalance
- Overheating the blade with a grinder, weakening the metal
- Ignoring nicks and dents, which worsen over time
Using a jig minimizes these mistakes by ensuring uniformity.
Alternative Sharpening Methods
If you don’t want to build a jig, other sharpening options include:
Bench grinders: Fast but require skill to maintain the correct angle.
Hand filing: Slower but offers better control.
Professional sharpening services: Ideal for heavily damaged blades.
However, a homemade jig remains the most cost-effective and precise method for regular maintenance.
Conclusion
A well-made sharpening jig ensures your lawn mower blades stay razor-sharp, significantly extending their lifespan while dramatically improving cutting performance. By following this detailed guide, you can build a simple yet highly effective jig that takes all the guesswork out of sharpening, giving you professional results every time. Remember to inspect your blades before each mowing season and maintain them properly for optimal performance. Investing just a little time in proper blade care will save you money on premature replacements and keep your mower running at peak efficiency. With this durable, easy-to-use jig in your toolkit, you’ll achieve barber-sharp edges that leave your lawn looking its absolute best after every cut.
Related topics:
- CHOOSING BEST GAS TYPES FOR WEED WACKERS: WHAT YOU NEED TO KNOW
- EXMARK LAZER Z: THE ULTIMATE ZERO-TURN MOWER FOR PROFESSIONALS
- TOP ELECTRIC STRING TRIMMERS OF 2024: OUR COMPREHENSIVE EVALUATION

