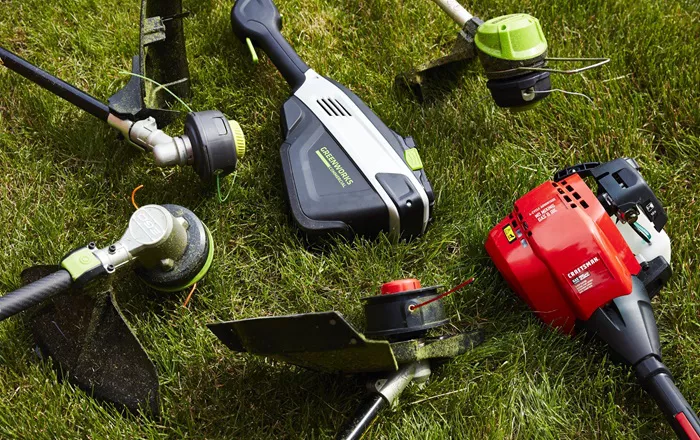
Starting a weed eater (also known as a string trimmer or weed whacker) correctly ensures smooth operation and extends the life of the equipment. Whether you have a gas-powered or electric model, the process can vary slightly. This guide will provide detailed instructions for both types of weed eaters to help you get started with ease.
1. Understand Your Weed Eater
Before you start, it’s important to understand the specific type of weed eater you have. Weed eaters come in two main types:
Gas-Powered Weed Eaters: These models use a mixture of gasoline and oil. They are typically more powerful and suited for larger tasks.
Electric Weed Eaters: These models are powered by electricity, either through a cord or a battery. They are usually lighter and easier to maintain but may have less power.
2. Preparing a Gas-Powered Weed Eater
Check the Fuel
Mix the Fuel: Gas-powered weed eaters require a mixture of gasoline and 2-stroke oil. Refer to your user manual for the correct fuel-to-oil ratio, which is typically 50:1 or 40:1. Mix the fuel and oil in a clean, approved container. Shake well to ensure the mixture is homogeneous.
Add Fuel: Remove the fuel cap from the weed eater’s fuel tank. Using a funnel, pour the mixed fuel into the tank until it is about 90% full. Avoid overfilling to prevent spillage.
Prime the Engine
Locate the Primer Bulb: The primer bulb is usually a small, round, rubber button located on the engine of the weed eater.
Press the Primer Bulb: Press the primer bulb several times (typically 5-10 times) to draw fuel into the carburetor. This action helps to ensure that the engine starts easily.
Set the Choke
Locate the Choke Lever: The choke lever is often found on the side of the engine. It helps to control the air-fuel mixture for starting.
Adjust the Choke: Move the choke lever to the “Start” or “Full Choke” position. This setting enriches the fuel mixture, making it easier for the engine to start.
Start the Engine
Engage the Safety Switch: Ensure the weed eater’s safety switch or lock is engaged, as this prevents accidental starting.
Pull the Starter Cord: Firmly grip the starter handle and pull the cord sharply. You may need to pull several times before the engine starts.
Adjust the Choke: Once the engine starts, move the choke lever to the “Run” or “Half Choke” position to allow the engine to warm up.
Let the Engine Warm Up: Allow the engine to run for a few minutes at idle to warm up before use. This helps the engine reach optimal operating temperature and performance.
See also: How To String A Weed Eater: A Step-By-Step Guide
3. Preparing an Electric Weed Eater
Check the Power Source
Corded Electric Weed Eaters: Ensure you have a suitable outdoor extension cord that can handle the power requirements of your weed eater. The cord should be rated for outdoor use and of adequate gauge.
Battery-Powered Weed Eaters: Ensure the battery is fully charged. If it’s a removable battery, insert it into the weed eater according to the manufacturer’s instructions.
Prepare for Operation
Plug In or Insert the Battery: For corded models, plug the extension cord into the weed eater’s power port. For battery models, insert the battery into the weed eater and ensure it is securely locked in place.
Check the Safety Switch: Make sure the safety switch or trigger lock is engaged to prevent accidental operation.
Start the Weed Eater
Power On: For corded models, simply switch the power on using the main power switch or trigger. For battery models, press the start button or squeeze the trigger to start the motor.
Adjust the Speed: Some electric models have variable speed controls. Adjust the speed according to your needs for optimal performance.
See also: The Ultimate Guide To Stihl Weed Eaters: Features, Benefits, And Top Models
4. Safety Tips
Wear Safety Gear: Always wear appropriate safety gear, including safety glasses, gloves, and long pants, to protect yourself from debris and potential injuries.
Check the Area: Before starting, clear the area of any obstacles or debris that could be thrown by the weed eater.
Maintain a Safe Distance: Keep bystanders, especially children and pets, at a safe distance while operating the weed eater.
5. Troubleshooting Common Issues
Engine Won’t Start (Gas-Powered): Check the fuel level and mixture, ensure the choke is set correctly, and verify that the primer bulb has been pressed sufficiently. If the problem persists, check for any clogs or issues with the spark plug.
Electric Weed Eater Not Working: Ensure the power source is functioning and properly connected. For battery models, check that the battery is charged and properly installed.
Engine Runs Rough: For gas-powered models, ensure the fuel mixture is correct and the air filter is clean. For electric models, check for any blockages or maintenance needs.
Conclusion
Starting a weed eater involves understanding the type of model you have and following specific steps for gas-powered or electric versions. Proper preparation, starting procedures, and safety precautions will ensure smooth operation and extend the life of your weed eater. Regular maintenance and troubleshooting can help address any issues that arise, ensuring that your equipment performs efficiently and effectively for all your lawn and garden needs.
Related Topics:

