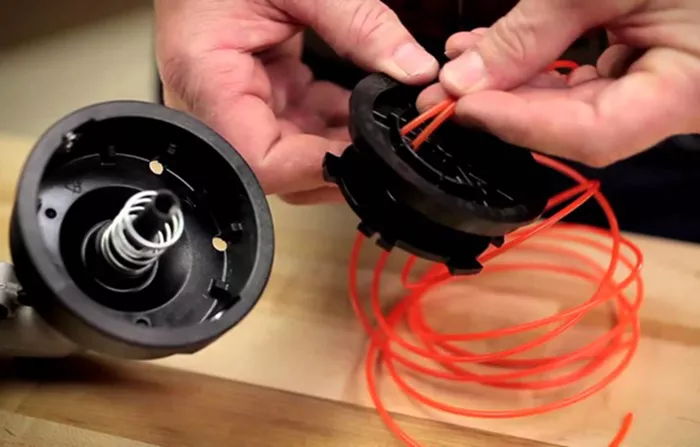
Winding weed eater string, also known as replacing or restringing the trimmer line, is a routine maintenance task that ensures your weed eater operates efficiently. Properly winding the string can help prevent issues such as jamming, uneven trimming, and excessive wear on the equipment. Here’s a step-by-step guide to winding weed eater string effectively.
Tools and Materials Needed
- Weed eater (also known as a string trimmer)
- Replacement string (make sure it matches the specifications of your trimmer)
- Scissors or wire cutters
- Gloves (optional for protection)
Step 1: Prepare the Weed Eater
Before starting, ensure your weed eater is turned off and disconnected from any power source. If it’s a gas-powered model, make sure the engine is cool before you begin. For electric models, either unplug the power cord or remove the battery to prevent accidental starts.
Step 2: Remove the Spool
Locate the trimmer head, which is typically at the end of the shaft. The spool housing is usually held in place by a cap that can be removed by either unscrewing it or pressing in tabs located on the side. Consult your trimmer’s manual for specific instructions, as the removal method can vary depending on the model.
Once the cap is off, gently pull out the spool from the housing. Be mindful of how the spool is positioned, as you’ll need to reinstall it in the same orientation later.
See also: How To Start A Weed Eater?
Step 3: Cut the Replacement String
Measure and cut a length of replacement string. The exact length required varies depending on your trimmer model, but a typical length is around 15 to 25 feet. It’s better to cut slightly more than you think you’ll need, as excess string can be trimmed later.
If your trimmer uses dual strings, cut two equal lengths of string.
Step 4: Wind the String onto the Spool
Single Line Spool
Locate the Anchor Hole: Most spools have a small hole or notch where you can anchor the string. Insert one end of the string into this hole to secure it.
Wind the String: Begin winding the string onto the spool in the direction indicated by an arrow on the spool (usually counterclockwise). Wind the string evenly and tightly, making sure it doesn’t overlap or bunch up.
Leave a Tail: When you have about 6 inches of string left, stop winding. Leave this length as the “tail” that will extend from the trimmer head when reassembled.
Dual Line Spool
Locate the Two Anchor Holes: Dual line spools have two holes, one for each string. Insert the end of each string into the corresponding hole.
Wind the Strings: Wind each string onto its respective side of the spool, keeping them separated by the spool’s divider. Follow the direction indicated by the arrows on the spool.
Leave Tails: Like with a single line, leave about 6 inches of string extending from each side of the spool.
Step 5: Reassemble the Trimmer Head
Once the string is wound, it’s time to reassemble the trimmer head:
Align the Tails: Feed the string tails through the eyelets on the trimmer head housing.
Place the Spool: Carefully insert the spool back into the housing, ensuring that the strings remain threaded through the eyelets.
Secure the Cap: Replace the cap by snapping it back into place or screwing it on, depending on your model.
See also: Evaluating Southwire: Innovations And Market Impact
Step 6: Adjust the String Length
Once the trimmer head is reassembled, gently pull the strings to ensure they move freely. The strings should be the correct length, extending about 6 inches from the trimmer head. If they’re too long, trim them to the appropriate length using scissors or wire cutters.
Step 7: Test the Trimmer
Finally, reconnect the power source or battery, or restart the engine if it’s a gas-powered model. Test the trimmer to ensure the string is feeding correctly and that the trimmer head is functioning smoothly. If the string doesn’t feed properly, double-check that it’s wound correctly and that the spool is seated properly in the housing.
Tips for Success
Use the Correct String: Always use the string type and size recommended by the manufacturer. Using the wrong string can cause the trimmer to malfunction and may even damage the trimmer head.
Keep the String Tension Even: As you wind the string, maintain even tension to prevent the string from overlapping or becoming tangled. Uneven winding can cause feeding issues during use.
Replace the String Regularly: Regularly inspect the trimmer string and replace it when it becomes worn or brittle. Fresh string cuts more efficiently and reduces strain on the trimmer motor.
Follow Manufacturer Instructions: Always refer to your trimmer’s manual for specific instructions, as different models may have unique features or requirements.
Conclusion
Winding weed eater string is a straightforward task, but doing it correctly is essential for optimal trimmer performance. By following these steps and using the correct materials, you can ensure your weed eater remains in good working condition, making yard maintenance easier and more efficient.
Related Topics:
-
Mister Fan Performance Analysis: Is It Worth The Investment?
-
Smoker Grill Combos Explained: Benefits, Features, And Buying Tips
-
Milwaukee Staple Gun Performance: A Detailed Look At Quality And Efficiency

