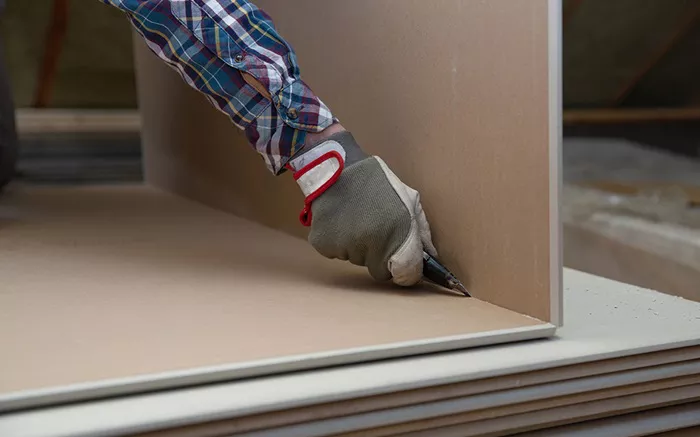
Cutting drywall accurately and efficiently is a crucial step in many home improvement projects. Whether you’re installing new drywall, creating openings for electrical outlets, or making adjustments to fit specific spaces, mastering the right cutting techniques will ensure a professional finish. In this guide, we’ll walk you through the best methods for cutting drywall, including the essential tools you’ll need, the most effective techniques, safety tips, and common mistakes to avoid.
1. Gather Your Tools
Essential Tools
Utility Knife: A sharp utility knife is fundamental for making straight cuts on drywall. It’s versatile and easy to use for most standard cuts.
Drywall Saw: Ideal for cutting curves, shapes, or larger openings in drywall. It features a serrated blade that makes it easier to cut through the material.
Straightedge or T-Square: Helps in making precise, straight cuts. It’s crucial for accurate measurements and cutting lines.
Measuring Tape: Essential for taking accurate measurements and ensuring your drywall fits perfectly.
Pencil: Use a pencil to mark cutting lines on the drywall clearly.
Optional Tools
Rotary Tool: Equipped with a drywall cutting bit, a rotary tool can cut complex shapes or large holes quickly.
Reciprocating Saw: Useful for larger projects or when cutting through both drywall and framing. It provides power and speed for heavy-duty tasks.
2. Measure and Mark
Measure Accurately
Start by measuring the dimensions of the area where the drywall will be installed. Accurate measurements are critical for ensuring that the drywall pieces fit correctly. Use a measuring tape to determine the exact size and shape required.
Mark Your Cut Line
For Straight Cuts: Use a straightedge or T-square to draw a clear, straight line on the drywall where you plan to cut.
For Curves or Irregular Shapes: Sketch the outline carefully, ensuring that the shape is precise. A compass or template might help in creating complex shapes.
See also: Drywall Cutters Unveiled: Comprehensive Review Of The Best Tools For The Job
3. Cutting Drywall
Straight Cuts with a Utility Knife
Score the Drywall: Place the utility knife along your marked line. Apply firm, even pressure to score the surface of the drywall. Make several passes with the knife if necessary to deepen the score line.
Snap the Drywall: Bend the drywall gently along the scored line. Hold the drywall firmly on both sides of the score to control the break and ensure a clean snap.
Cut the Back Paper: After snapping, use the utility knife to cut through the back paper along the same line to separate the piece cleanly.
Curved or Irregular Cuts with a Drywall Saw
Drill a Starter Hole: For curves or complex shapes, drill a hole inside the area you want to cut. This hole allows you to insert the drywall saw blade.
Cut Along the Line: Insert the drywall saw into the starter hole and follow the marked line. Move the saw steadily to cut along the line, keeping the blade aligned to ensure accuracy.
Large or Intricate Cuts with a Rotary Tool
Use the Appropriate Bit: Attach a drywall cutting bit to the rotary tool for optimal performance.
Cut Carefully: Follow the marked line or shape with the rotary tool. This method is particularly useful for larger or detailed cuts, offering speed and precision.
4. Safety Tips
Wear Safety Gear
Safety Glasses: Protect your eyes from dust and debris during cutting.
Dust Mask: Prevent inhaling drywall dust, which can be harmful to your respiratory system.
Handle Tools Properly
Keep Tools Sharp: Ensure that blades and saws are sharp to avoid jagged cuts and potential accidents.
Use Tools Correctly: Follow the manufacturer’s instructions for using each tool to ensure safety and efficiency.
Work in a Well-Ventilated Area
Drywall cutting produces dust, so it’s important to work in a space with good ventilation or use dust extraction equipment to minimize inhalation of dust particles.
See also: How To Cut Sheet Metal?
5. Finishing Touches
Smooth the Edges
After cutting, use a utility knife or sanding block to smooth any rough or uneven edges. This step ensures a clean finish and prepares the drywall for installation.
Check the Fit
Before proceeding with installation, place the cut drywall piece in its designated area to verify that it fits correctly. Make any necessary adjustments to ensure a proper fit.
Prepare for Installation
Apply Joint Compound: Fill seams and screw holes with joint compound. This step is crucial for achieving a smooth surface.
Tape Seams: Apply drywall tape over seams and cover with joint compound for a seamless finish.
Sand the Surface: Once the joint compound is dry, sand the surface to achieve a smooth, even finish before painting.
6. Common Mistakes to Avoid
Rushing the Cut
Take your time to measure and cut accurately. Rushing can lead to mistakes, uneven cuts, and wasted materials.
Using the Wrong Tool
Choose the right tool for the type of cut you need. Using a utility knife for curves or a drywall saw for straight cuts can result in uneven edges and increased difficulty.
Not Measuring Twice
Always double-check your measurements before cutting. Incorrect measurements can lead to ill-fitting drywall and additional work to correct mistakes.
Conclusion
Cutting drywall for a DIY home improvement project requires using the right tools and techniques to ensure clean and accurate results. By measuring carefully, marking clearly, and choosing the appropriate cutting method, you can achieve professional-quality results with minimal hassle. Prioritize safety, take your time, and avoid common mistakes to make your drywall project a success. With these tips, you’ll be well-prepared to handle your drywall cutting tasks effectively and efficiently.
Related Topics:
-
Dewalt 7491RS: The Ultimate Jobsite Table Saw For Precision And Power
-
DeWalt Impact Drill Evaluation: Is This The Best Tool For The Job?
-
Milwaukee Pipeline 2024: Unpacking The Highlights And Innovations
-
Makita Leaf Blower Guide: Best Models For Every Type Of Yard

