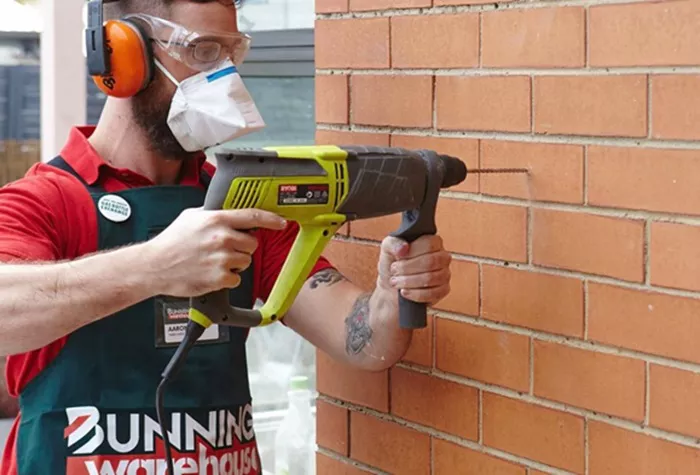
Screwing into brick can be a daunting task, especially if you’re not familiar with the right techniques and tools. Brick is a durable and sturdy material, but it requires specific methods to ensure a secure and stable installation. Whether you’re mounting shelves, hanging fixtures, or securing brackets, understanding the proper techniques will make the process smoother and more effective. This guide will walk you through each step of screwing into brick, from preparation to execution, ensuring you achieve a successful result.
1. Gather the Right Tools and Materials
Before you start, ensure you have the following tools and materials:
Drill: A hammer drill is preferred for its ability to handle the tough material of brick.
Masonry Drill Bits: Specifically designed for drilling into brick, these bits can handle the hardness of the material.
Screws: Use masonry screws or anchors suitable for brick.
Anchors: Plastic or metal anchors are used to provide a secure hold for screws.
Hammer: For tapping in anchors if needed.
Screwdriver: To drive the screws into the anchors.
Safety Gear: Safety glasses and a dust mask to protect yourself from debris.
2. Choose the Right Screws and Anchors
The choice of screws and anchors depends on the weight and type of material you’re attaching to the brick. For light to moderate loads, masonry screws may suffice. For heavier loads, use expansion anchors or wall plugs.
Masonry Screws: These screws are designed to tap into brick without needing a separate anchor.
Expansion Anchors: These are used in conjunction with screws and expand within the hole to hold the screw securely.
Plastic Wall Plugs: Commonly used for lighter loads, they expand when the screw is driven in.
See also: How To Drill Into Brick?
3. Mark the Drill Holes
Use a pencil or marker to mark the spots where you want to drill. Ensure your markings are level and evenly spaced. This will help ensure that whatever you are mounting or securing is aligned properly.
4. Drill the Holes
Select the Right Drill Bit: Choose a masonry drill bit that matches the size of the anchors or screws you’re using.
Set the Drill to Hammer Mode: If using a hammer drill, set it to the hammer function to make drilling into brick easier.
Drill at the Right Speed: Drill at a steady, medium speed. Too fast can overheat the drill bit, while too slow may not penetrate the brick effectively.
Apply Steady Pressure: Apply consistent pressure without forcing the drill. Let the drill bit do the work.
5. Insert the Anchors
After drilling the holes, clean out the dust using a vacuum or a small brush. Insert the anchors into the holes:
For Plastic Anchors: Push them into the hole until they are flush with the surface.
For Metal Expansion Anchors: Tap them in with a hammer until they are flush with the surface.
6. Drive the Screws
Once the anchors are in place, you can drive the screws:
Align the Screw with the Anchor: Insert the screw into the anchor and use a screwdriver or drill to turn it clockwise.
Drive Until Secure: Tighten the screw until it is secure, but avoid over-tightening as this could damage the brick or the anchor.
7. Check for Stability
After installation, check the stability of the screws and anchors. Ensure that the object or fixture you’re attaching is firmly secured and doesn’t wobble.
See also: How To Use A Whetstone: A Comprehensive Guide
8. Troubleshooting Common Issues
Cracking or Breaking Brick: If you notice cracks or the brick is breaking, it may be due to excessive force or using the wrong drill bit. Try a smaller bit and a lighter touch.
Loose Screws: If screws are not holding well, it may be due to incorrect size or type of anchor. Reassess your anchors and screws, and ensure they are suitable for brick.
9. Additional Tips
Pre-drilling: For large screws or anchors, pre-drilling a smaller pilot hole can help make the process smoother.
Avoid Mortar Joints: Drill into the brick itself rather than the mortar joints for a more secure hold.
Use a Level: To ensure your installation is straight and even, use a level during the marking and drilling process.
Conclusion
Successfully screwing into brick requires the right tools, materials, and techniques. By gathering the necessary equipment, choosing appropriate screws and anchors, and following proper drilling and installation procedures, you can achieve a stable and secure result. Whether you’re mounting shelves, hanging artwork, or attaching fixtures, these tips and tricks will help you navigate the challenges of working with brick. With careful preparation and execution, you can ensure that your installation is both functional and long-lasting.
Related Topics:

