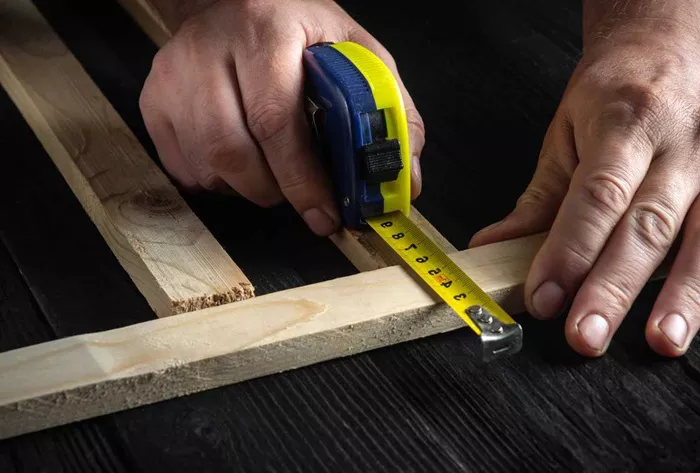
Accurate measurements are crucial in many fields, including construction, carpentry, sewing, and DIY projects. The tape measure, while seemingly simple, is a powerful tool that requires understanding for effective use. This comprehensive guide provides a detailed overview of how to read a tape measure cheat sheet, including key components, measurement techniques, and practical applications.
Understanding the Tape Measure
Components of a Tape Measure
Blade: The flexible metal strip that extends and retracts. It is typically marked with measurements in inches and centimeters.
Housing: The protective case that contains the tape blade. It is usually made of plastic or metal to ensure durability.
Hook: A small metal tab at the end of the blade, which helps to secure the tape measure in place. It slides slightly to compensate for its thickness, ensuring accuracy for internal and external measurements.
Locking Mechanism: Allows the blade to be locked in place at a specific measurement to make reading easier.
Types of Tape Measures
Standard Tape Measure: Commonly marked in both inches and centimeters. Suitable for general purposes.
Laser Tape Measure: Uses laser technology for precise measurements over longer distances and may include additional features like area and volume calculations.
Digital Tape Measure: Provides electronic readouts and may include memory functions and unit conversions for enhanced accuracy and ease of use.
Reading Inches
Basic Structure
Full Inches: Marked with long, thick lines. Each represents one whole inch.
Half-Inch: Marked by a medium-length line halfway between two full-inch lines.
Quarter-Inch: Indicated by shorter lines between half-inch marks.
Eighth-Inch and Sixteenth-Inch: Represented by progressively shorter lines, allowing for detailed measurements.
Example Measurement
To measure 3 inches and 5/16 inches, locate the 3-inch mark and count an additional 5/16 inches past the 3-inch mark. This level of detail is crucial for precise tasks like carpentry or tailoring.
Reading Feet
Basic Structure
Feet Markings: Indicated by larger numbers (e.g., 1′, 2′, 3′). Every 12 inches is marked as one foot.
Combined Feet and Inches: Measurements like 1′ 6″ combine feet and inches on the same scale, helping to quickly determine dimensions.
Example Measurement
For a measurement of 4 feet 6 inches, locate the 4-foot mark and measure an additional 6 inches. This is useful for tasks such as framing walls or fitting large fixtures.
See also: How To Read A Tape Measure In Millimeters (Mm): A Detailed Guide
Reading Centimeters and Millimeters
Basic Structure
Centimeters: Marked with longer lines, each representing one centimeter.
Millimeters: Indicated by the smallest lines on the tape, dividing each centimeter into ten parts.
Example Measurement
To measure 25 centimeters and 4 millimeters, find the 25 cm mark and count an additional 4 millimeters. This is essential for tasks requiring precise metric measurements, like scientific work or international projects.
Measuring Techniques
Step-by-Step Guide
Align the Tape: Position the tape at the starting point of your measurement.
Extend the Tape: Pull the tape out to the endpoint, keeping it straight and taut.
Read the Measurement: Check the point where the tape intersects with the end of the object being measured.
Accuracy Tips
Ensure Straightness: Hold the tape measure straight and avoid bending it.
Use Magnification: For small measurements, a magnifying glass can help view tiny lines.
Double-Check: Repeat the measurement process to confirm accuracy, especially for critical dimensions.
Quick Reference
Conversion Factors
- 1 Inch = 2.54 Centimeters
- 1 Foot = 30.48 Centimeters
- 1 Millimeter = 0.03937 Inches
Example Conversions
A measurement of 3 inches converts to approximately 7.62 centimeters.
A measurement of 5 feet 8 inches converts to approximately 172.72 centimeters. Accurate conversions are essential for maintaining consistency across different measurement systems.
Practical Applications
Construction and Carpentry
Cutting Materials: Accurate measurements ensure that materials are cut to the correct size.
Framing and Fitting: Precision is crucial for framing structures and fitting components together seamlessly.
Home Improvement
Fitting Furniture: Ensures that items fit properly in designated spaces.
Installing Fixtures: Accurate measurements prevent errors and ensure a professional finish.
Sewing and Crafting
Cutting Fabric: Precise measurements are vital for cutting fabric and drafting patterns.
Crafting Projects: Ensures that components align correctly and the final product meets expectations.
Conclusion
Mastering the use of a tape measure is a crucial skill that enhances precision in various projects. By understanding the components of a tape measure, the different types available, and the methods for reading both imperial and metric units, you can ensure accurate measurements and successful outcomes. Whether you’re working on construction, home improvement, or crafting, effective use of a tape measure is key to achieving the best results. With the knowledge and techniques outlined in this guide, you’re equipped to handle any measuring task with confidence and accuracy.
Related Topics:

