Maintaining a lawn mower can be an essential part of keeping your lawn in tip-top shape. One of the key components of a Murray lawn mower is its carburetor, responsible for mixing air and fuel in the proper ratio for the engine to run efficiently. Knowing where to find and how to maintain the carburetor can improve the performance and longevity of your mower. In this article, we’ll walk you through the steps of locating, identifying, accessing, and maintaining the carburetor on a Murray lawn mower.
1. General Location
Typical Position
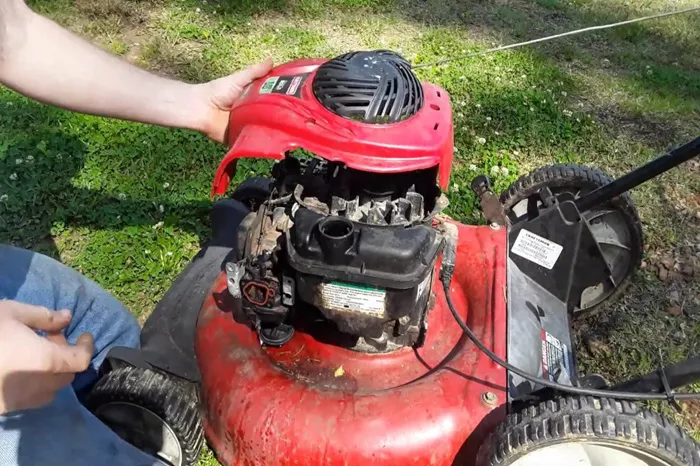
The carburetor on a Murray lawn mower is typically located underneath the engine cover. It is often positioned near the air filter, which plays a crucial role in delivering clean air to the engine for combustion. You can usually spot the carburetor by looking for a small, cylindrical device with various tubes, hoses, and cables connected to it.
The carburetor will be situated slightly behind or below the air filter housing, depending on the specific model of your Murray mower. It is important to know this location, as the carburetor is vital for the mower’s overall operation.
2. Identifying the Carburetor
Common Features
Several key features are common to most carburetors on Murray lawn mowers:
Fuel Line: A rubber or metal line runs from the fuel tank to the carburetor, delivering fuel to the engine.
Throttle Linkage: This controls the engine’s speed by regulating the amount of air and fuel entering the carburetor.
Choke: A small lever or mechanism that helps regulate the air intake, allowing the engine to start more easily by enriching the fuel mixture when cold.
The carburetor may have an air intake side, a fuel intake side, and an exhaust port, all of which are connected to different parts of the engine to facilitate efficient combustion.
3. Accessing the Carburetor
Removing the Engine Cover
To access the carburetor, the first step is removing the engine cover. This step may vary depending on the model of your Murray lawn mower. Typically, the engine cover will be secured with screws or bolts.
Use a screwdriver or socket wrench to carefully remove any screws or bolts that are securing the engine cover in place.
After removing the fasteners, gently lift the engine cover away from the engine. Take note of any additional components that may be connected to the engine cover, such as wiring or air ducts.
Air Filter Removal
Once the engine cover is removed, you’ll likely need to remove the air filter to get a clearer view of the carburetor. The air filter is typically housed in a separate compartment that sits right next to the carburetor.
Look for the air filter housing, which may be a rectangular or cylindrical box, often secured by screws or clips.
Gently remove the air filter housing and take out the air filter itself. Be careful not to damage any parts as you remove them.
By removing both the engine cover and the air filter, you’ll have better access to the carburetor, making it easier to clean or inspect for any issues.
4. Maintenance and Cleaning
Cleaning Tips
Cleaning the carburetor is an important part of maintenance. Over time, fuel residue, dirt, and debris can accumulate inside the carburetor, affecting the engine’s performance. Here are some useful tips for cleaning:
Use Carburetor Cleaner: Spray a carburetor cleaner onto the carburetor’s components to loosen dirt and grime. Use a soft brush to scrub the areas around the fuel line and throttle linkage.
Check the Jets: The carburetor contains small jets that allow fuel to flow into the combustion chamber. If these jets become clogged, they can prevent proper fuel flow. Use a needle or small wire to clean out the jets carefully.
Inspect the Fuel Line: The fuel line that leads to the carburetor should be free from cracks and blockages. If necessary, replace any worn fuel lines to ensure proper fuel delivery.
Common Issues
Several issues may arise with the carburetor that could require maintenance:
Clogging: If the carburetor becomes clogged with dirt, debris, or old fuel, the engine may struggle to start or run erratically. Regular cleaning can prevent this issue.
Fuel Residue Buildup: Over time, old fuel can leave a residue that builds up inside the carburetor. This buildup can prevent fuel from flowing correctly and lead to starting problems.
Air-Fuel Mixture Imbalance: If the carburetor’s air-fuel mixture is not set properly, the engine may run too rich (excess fuel) or too lean (not enough fuel), causing poor engine performance.
Conclusion
Knowing where the carburetor is located and how to properly maintain it can significantly enhance the performance of your Murray lawn mower. By locating the carburetor, identifying its components, accessing it for cleaning, and performing regular maintenance, you can help your mower run smoothly and efficiently for years to come. Keep in mind the importance of the carburetor in maintaining the balance of air and fuel, ensuring your lawn mower operates at its best.
Related topics:
- Where is the Choke on a Craftsman Lawn Mower? A Complete Guide
- Where is the Carburetor on a Cub Cadet Lawn Mower?
- Where to Buy a Flymo Electric Lawn Mower: A Comprehensive Guide

