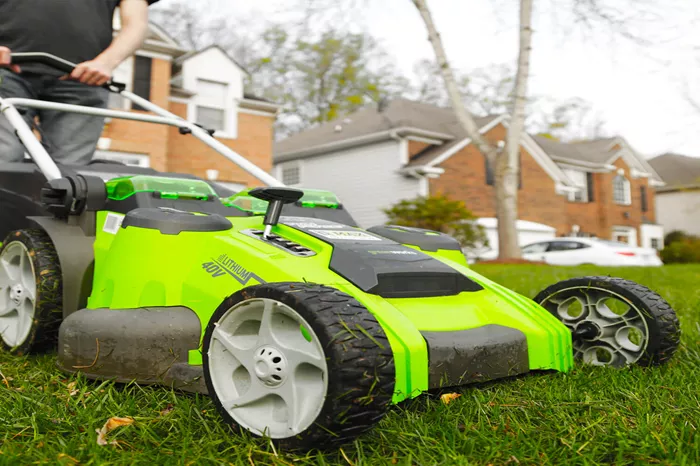
A well-maintained lawn adds beauty to any home, just like a great cup of coffee starts the day on the right note. Greenworks lawn mowers offer an eco-friendly way to keep your grass looking neat and healthy. Whether you have a corded or cordless model, setting up your Greenworks lawn mower properly ensures smooth operation and long-term performance. This guide provides detailed, step-by-step instructions for unboxing, assembling, and preparing your mower for its first use.
Unboxing and Inspection
Step 1: Unboxing the Lawn Mower
When you receive your Greenworks lawn mower, follow these steps to unbox it properly:
Place the box on a flat surface and use a box cutter or scissors to open it carefully.
Remove all components one by one, ensuring nothing is left behind in the packaging.
Keep the packaging materials aside until you confirm that all parts are included and undamaged.
Step 2: Inspecting the Components
Before assembling your mower, conduct a thorough inspection:
Check the main mower body for any visible damage, such as cracks or dents.
Ensure all parts listed in the user manual are present, including the handle, wheels, battery (for cordless models), charger, grass catcher, and any other accessories.
Inspect the battery and charger (for cordless models) for any visible signs of damage.
Verify that the bolts, nuts, and screws needed for assembly are included.
If you find any missing or damaged components, contact Greenworks customer service before proceeding with assembly.
Assembly Instructions
Step 1: Attaching the Handle
The handle is one of the most important parts of your mower. To attach it correctly:
Unfold the handle and align it with the attachment points on the mower’s main body.
Use the provided knobs or bolts to secure the handle in place.
Adjust the handle height to a comfortable level before tightening all connections.
Step 2: Attaching the Wheels (If Not Pre-installed)
Some Greenworks models may require you to install the wheels manually:
Position the wheels on their designated axles.
Secure them using the included fasteners, ensuring they are tightly fitted.
Spin the wheels to check for smooth movement.
Step 3: Installing the Grass Catcher or Mulching Plug
Depending on your mowing preference:
If using the grass catcher, attach it to the rear of the mower by hooking it securely in place.
If mulching, insert the mulching plug into the designated slot before closing the rear flap.
Battery Installation (For Cordless Models)
Step 1: Charging the Battery
Before using your cordless mower, charge the battery fully:
Plug the charger into a power outlet.
Insert the battery into the charger.
Wait for the indicator light to signal a full charge (this may take 60–120 minutes depending on the model).
Step 2: Installing the Battery
Once the battery is charged:
Open the battery compartment on the mower.
Align the battery terminals with the connectors inside the compartment.
Firmly push the battery into place until you hear a click.
Close the compartment securely to protect the battery from debris and moisture.
Starting the Mower
Step 1: Engaging the Safety Features
Greenworks mowers include safety mechanisms to prevent accidental startups:
Ensure the safety key (if applicable) is inserted properly.
Hold the safety bar or engage the safety button before attempting to start the mower.
Step 2: Using the Push-Button Start Mechanism
Most Greenworks mowers feature an easy push-button start:
Press and hold the safety button.
While holding the button, pull the bail lever towards the handle.
Release the button while keeping the lever engaged to keep the mower running.
For corded models, plug the power cord into a grounded outlet before following the steps above.
Adjusting Settings
Step 1: Setting the Cutting Height
Greenworks mowers allow height adjustments for different grass lengths:
Locate the height adjustment lever, usually positioned near the wheels.
Move the lever to the desired setting, ranging from low (short cut) to high (longer cut).
Step 2: Choosing Mulching, Bagging, or Side Discharge
Mulching: Keeps the clippings in the lawn to act as natural fertilizer.
Bagging: Collects clippings in the grass catcher for disposal.
Side Discharge: Ejects clippings through a side chute.
Choose the option that best suits your lawn maintenance needs.
Safety Tips
Wear closed-toe shoes and avoid loose clothing while operating the mower.
Keep children and pets at a safe distance during mowing.
Never touch the blade area when the mower is on or the battery is inserted.
For corded models, use an outdoor-rated extension cord and avoid running over it while mowing.
Store the mower in a dry, covered space when not in use.
Troubleshooting and Maintenance
Common Setup Issues
Mower Won’t Start: Ensure the battery is charged and properly installed or check if the power cord is connected securely.
Uneven Cutting: Adjust the height settings and check for clogged grass buildup under the deck.
Handle Feels Loose: Tighten all knobs and bolts securing the handle.
Regular Maintenance
Clean the mower deck after each use to prevent grass buildup.
Sharpen the blade every few months for optimal cutting performance.
Inspect the battery and charger periodically for wear and tear.
Store the battery in a cool, dry place when not in use to extend its lifespan.
Conclusion
Setting up your Greenworks lawn mower correctly ensures efficient performance and longevity. Just like making the perfect cup of coffee requires attention to detail, a well-assembled and maintained mower guarantees a clean and healthy lawn. Follow these steps carefully, and you’ll be ready to enjoy an eco-friendly mowing experience with ease.
Related topics:
- Where Can I Rent a Commercial Lawn Mower?
- How Do I Know When My Lawn Mower Battery Is Fully Charged?
- Where Is the Carburetor on a John Deere Lawn Mower?

