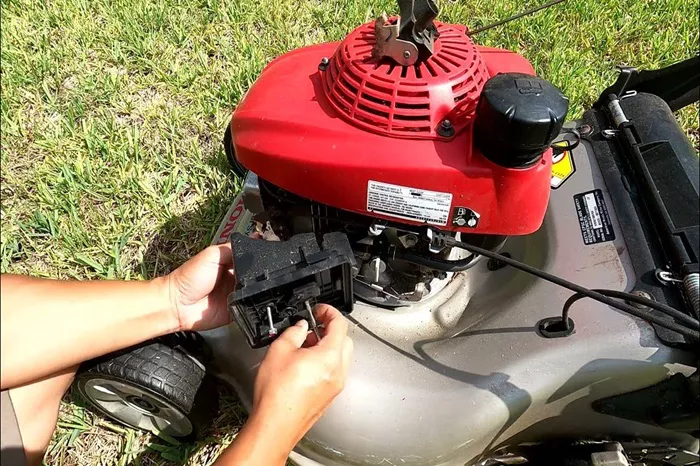
Honda lawn mowers are known for their reliability, but like any machine, they require occasional maintenance to run smoothly. One essential component is the choke system, which helps the engine start properly and run efficiently. If your mower is struggling to start, idling roughly, or stalling, it might be time to adjust the choke.
This guide will walk you through everything you need to know about adjusting the choke on a Honda lawn mower. Using simple instructions and easy-to-follow steps, we’ll ensure you get your mower running smoothly again.
What Does the Choke Do?
The choke is a crucial part of your Honda lawn mower’s carburetor. It controls the amount of air entering the engine, making it easier to start, especially in cold conditions. When the choke is engaged (closed), it restricts airflow, enriching the fuel mixture. This helps the engine fire up quickly. Once the engine warms up, the choke should be opened to allow normal airflow and efficient fuel combustion.
Signs Your Choke Needs Adjustment
If your lawn mower’s choke is not adjusted correctly, you might notice the following issues:
Hard starting: The engine takes multiple pulls to start.
Rough idling: The engine sputters or runs unevenly.
Stalling: The mower shuts off soon after starting.
Excessive fuel consumption: A misadjusted choke can make the engine run too rich, wasting fuel.
Black smoke from the exhaust: This indicates too much fuel is being burned due to an overly rich mixture.
Adjusting the choke can often resolve these problems and improve overall performance.
Safety Precautions
Before working on your lawn mower, take the following safety precautions:
Turn off the engine: Never adjust the choke while the mower is running.
Disconnect the spark plug wire: This prevents accidental starts.
Work in a well-ventilated area: If you’re indoors, ensure proper airflow to avoid inhaling fumes.
Wear gloves and safety glasses: Protect your hands and eyes from dirt, fuel, and moving parts.
Let the engine cool: Avoid working on a hot engine to prevent burns.
Tools and Materials Needed
To adjust the choke on your Honda lawn mower, gather the following tools:
Screwdriver (Phillips or flathead, depending on the adjustment screw)
Wrench set (for tightening or loosening bolts if needed)
Honda owner’s manual (to reference the specific model’s choke system)
Work gloves (for hand protection)
Shop rag or paper towels (to wipe away dirt or excess fuel)
Step-by-Step Guide to Adjusting the Choke
1. Locate the Choke Lever
The choke lever is typically found near the carburetor on the side of the engine. Depending on your model, it may be a manual choke that you adjust by hand or an automatic choke that adjusts itself. Look for a small lever labeled “choke” or a symbol resembling a butterfly valve.
For manual choke models, the lever moves between “open” (or “run”) and “closed” (or “start”). If your mower has an automatic choke, you may need to adjust the choke cable instead.
2. Adjust the Choke Cable
If the choke is not working correctly, the cable might be misaligned. Follow these steps to adjust it:
Step 1: Loosen the Choke Cable Adjustment Screw
Use a screwdriver or wrench to slightly loosen the screw holding the choke cable in place. Do not remove the screw entirely—just loosen it enough to move the cable.
Step 2: Position the Choke Cable Correctly
Move the choke lever to the full closed position (as if you were starting the engine).
Adjust the choke cable so that the butterfly valve inside the carburetor fully closes when the choke lever is engaged.
Tighten the adjustment screw securely to hold the cable in place.
3. Test the Adjustment
After adjusting the choke, test the mower to ensure it starts and runs smoothly:
Reconnect the spark plug wire and ensure the mower is on a flat surface.
Engage the choke by moving the lever to the “start” position.
Pull the starter cord or use the electric start to turn on the engine.
Observe the engine’s behavior:
If the engine starts quickly and runs smoothly, the adjustment was successful.
If it still struggles to start, repeat the adjustment process.
If the engine starts but runs too rich (producing black smoke), slightly loosen the choke setting.
Once the engine is running, move the choke lever to the open position to allow normal airflow.
Additional Tips and Considerations
1. Maintain Your Choke System Regularly
Clean the carburetor: A dirty carburetor can cause choke issues. Use carburetor cleaner to remove buildup.
Inspect the choke cable: Over time, cables can stretch or wear out. Replace it if necessary.
Check for fuel quality: Old or stale fuel can affect engine performance. Use fresh gasoline for the best results.
2. When to Seek Professional Help
If adjusting the choke does not solve the problem, consider these factors:
The choke lever feels loose or broken: This may require a replacement part.
The engine still stalls or runs poorly: The issue could be with the carburetor, fuel system, or ignition.
You are unsure about the repair: A professional mechanic can diagnose and fix the problem quickly.
Conclusion
Adjusting the choke on your Honda lawn mower is a simple yet essential task to keep your mower running efficiently. By following the steps in this guide, you can troubleshoot and fix common choke-related issues, ensuring a smoother start and better performance.
Regular maintenance of your mower’s choke system, carburetor, and fuel quality will help extend its lifespan and keep your lawn looking great with minimal hassle. If you ever encounter persistent issues, don’t hesitate to seek professional assistance.
Now that your mower is in top shape, grab a cup of coffee, enjoy the fresh air, and get ready for a smooth mowing experience!
Related topics:
- Who Makes Pulsar Lawn Mower Engines?
- What Type of Oil for Yard Machine Lawn Mower?
- How to Start Auto Choke Lawn Mower

