Stripped screws can be a frustrating issue during repairs or construction projects. When a screw’s head becomes damaged, it can be challenging to remove it using conventional methods. This guide provides detailed steps and techniques to effectively remove a stripped screw and offers tips to avoid future stripping.
1. Understanding Stripped Screws
What is a Stripped Screw
A stripped screw occurs when the grooves on the screw head become worn out, preventing a screwdriver or drill bit from properly gripping and turning it. This can happen due to using the wrong tool, applying excessive force, or the screw being over-tightened.
Why Stripped Screws Are Problematic
Stripped screws can make it difficult to disassemble or remove components, leading to delays and potential damage to the surrounding material. Addressing stripped screws promptly ensures smoother repairs and prevents further complications.
2. Preparing to Remove a Stripped Screw
Assess the Situation
Examine the Screw Head: Determine the extent of the damage to the screw head. The level of stripping will influence the method you use to remove it.
Select Appropriate Tools: Gather the tools you may need, including screwdrivers, pliers, and specialty removal tools.
Safety First
Wear Safety Glasses: Protect your eyes from debris or accidental slips.
Clear the Area: Ensure that your workspace is free of obstructions and that you have adequate lighting.
3. Methods for Removing a Stripped Screw
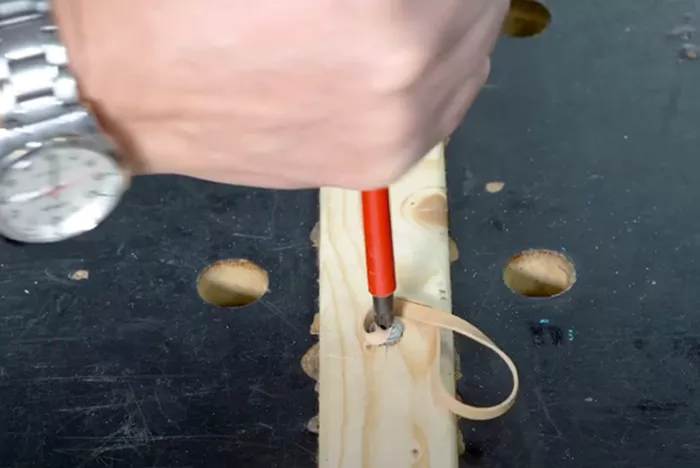
Method 1: Using a Rubber Band
Place the Rubber Band: Insert a rubber band into the stripped screw head. This provides extra grip and cushioning.
Turn the Screwdriver: Gently turn the screwdriver counterclockwise. The rubber band should help the screwdriver grip the stripped grooves.
Method 2: Using Pliers
Grip with Pliers: Use needle-nose pliers or locking pliers to grip the outer edges of the screw head.
Turn the Screw: Carefully rotate the pliers counterclockwise to unscrew the damaged screw.
Method 3: Using a Screw Extractor
Drill a Pilot Hole: If necessary, drill a small pilot hole in the center of the screw head to create a point of engagement.
Insert the Extractor: Place a screw extractor bit into the pilot hole. Turn the extractor counterclockwise using a wrench or drill, which should grip and remove the screw.
Method 4: Using a Dremel Tool
Cut a New Slot: Use a Dremel tool with a cutting wheel to create a new slot in the screw head.
Use a Flathead Screwdriver: Insert a flathead screwdriver into the new slot and turn counterclockwise to remove the screw.
Method 5: Drilling Out the Screw
Select a Drill Bit: Choose a drill bit that is slightly smaller than the screw head.
Drill into the Screw: Carefully drill into the center of the screw head, which should break the screw free from its threads.
Remove the Remaining Pieces: Once the screw head is drilled off, you may be able to remove the remaining screw shaft with pliers or by unscrewing it manually.
4. Tips to Prevent Stripped Screws
Use the Right Tools
Proper Screwdriver Size: Always use a screwdriver or drill bit that matches the size and type of the screw head.
High-Quality Tools: Invest in quality tools that provide better grip and reduce the likelihood of stripping.
Apply Correct Force
Avoid Over-Tightening: Apply the correct amount of torque when fastening screws. Over-tightening can lead to stripping.
Use Steady Pressure: Maintain consistent pressure while turning the screw to avoid slippage.
Check Screw Condition
Inspect for Damage: Regularly check screws and replace any that show signs of wear or damage before they cause problems.
Conclusion
Removing a stripped screw requires a combination of the right techniques and tools. By understanding the problem and applying the appropriate method, you can effectively remove a stripped screw and prevent future issues. Whether using simple household items or specialized tools, the key is to approach the task with patience and precision.
Related Topics:

